Platform Administration
This guide retains its historical filename (
14-admin-console.md) and old anchor links; the product term is now Platform.
This guide covers all administration features available to users with the Admin role. The platform tooling lives in the sidebar under Platform (routes /admin/*). While there, the shell shows a persistent Platform administration indicator and no tenant context is displayed — the ZEV switcher is hidden until you re-enter a community via Overview → ZEVs → Manage (your previously selected community is preserved).
The Platform group has four entries (hubs with tabs-as-routes):
- Overview (
/admin) — KPIs · ZEVs · All invoices · Dynamic price sources · Platform audit log · System health - Accounts (
/admin/accounts) — Users · API keys - Templates (
/admin/templates) — PDF templates · Email templates - System Settings (
/admin/system-settings) — Regional Settings · Functions · OAuth · Security · VAT · Backup
Legacy routes (/admin/zevs, /admin/invoices, /admin/audit-logs,
/admin/api-keys, /admin/pdf-templates, /admin/email-templates) redirect
to the matching hub tab.
For general role information, see Roles and Permissions.
ZEV Management
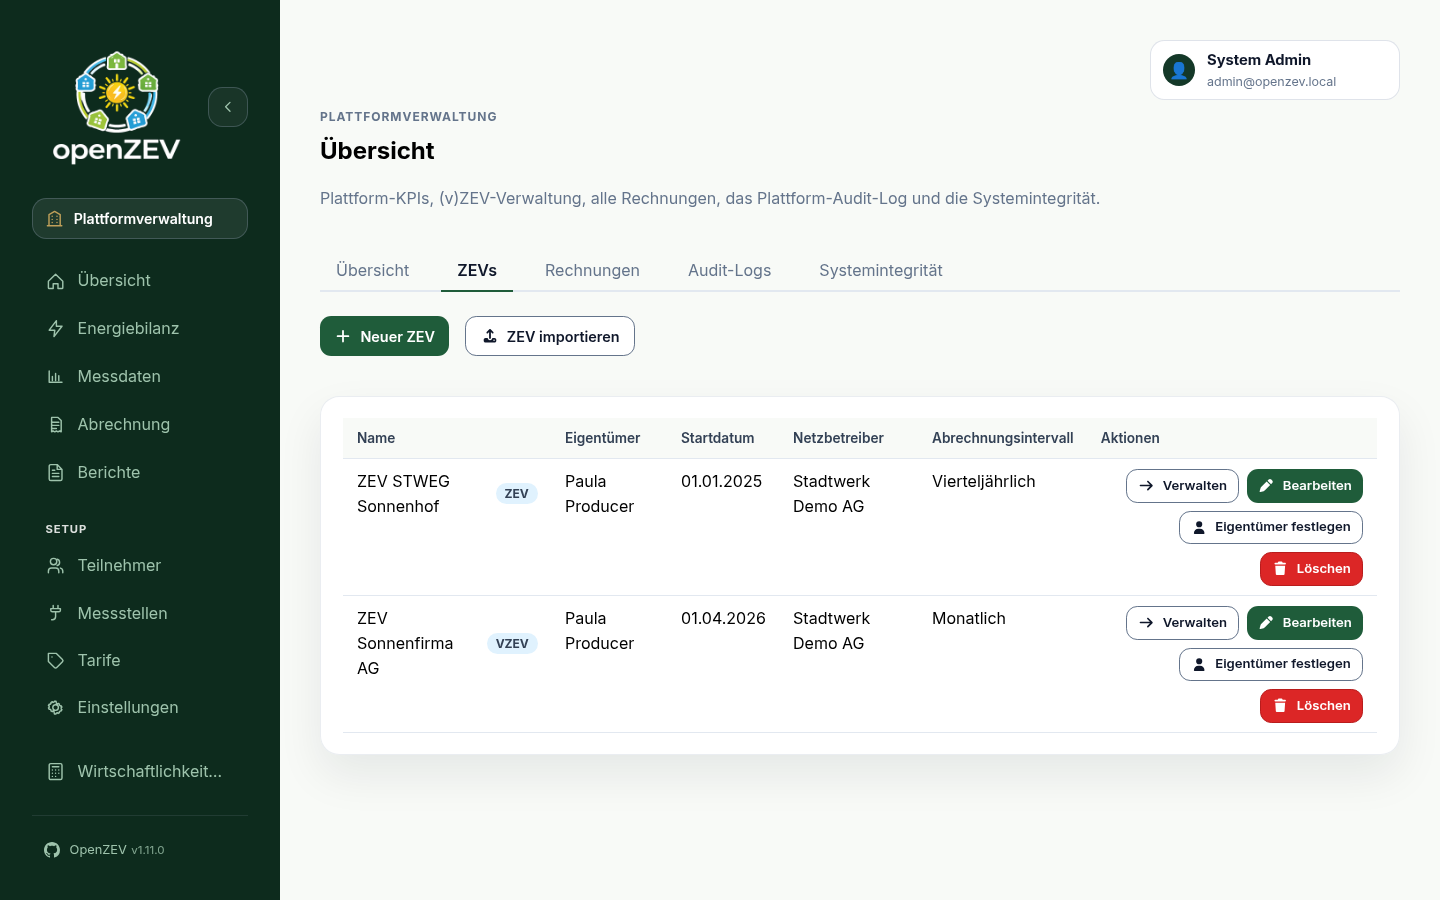
Admins can view and manage all ZEVs in the system.
- Go to Platform → Overview → ZEVs
- The list shows all ZEVs with their name, type, responsible person, and status. A Missing or invalid IBAN badge marks ZEVs with no valid IBAN configured — billing cannot issue payable QR invoices for them yet. The badge reports IBAN status only, not overall setup or period readiness.
- Click Manage on a row to enter that ZEV's working scope (selects the ZEV and opens its dashboard)
Creating a ZEV (with Responsible Person Wizard)
Admins can create a ZEV together with a new responsible-person account in one wizard:
- Click New ZEV
- Step 1 — fill in ZEV details (name, start date, type, billing interval, etc.).
- Step 2 — fill in the responsible person details (name, address, email). The payment section belongs with this person because the participant record supplies the creditor name and address on QR-Rechnungen. Enter the optional Bank Name and Bank IBAN for the account receiving participant payments. Skipping the IBAN leaves the Missing or invalid IBAN list badge and the Overview QR warning until the fields are filled under ZEV Settings → Billing & payment
- Step 3 — optionally add initial metering points for the responsible person
- Step 4 — review, then click Create ZEV
The system creates the ZEV, the responsible-person account with the ZEV Owner role and a temporary password, its participant record, and the listed metering points. The temporary password is shown once at the end — pass it on to the responsible person, who sets their own password at first sign-in.
Admins can also create a bare ZEV (without the wizard) through the API, assigning an existing user as owner.
Dynamic Price Sources
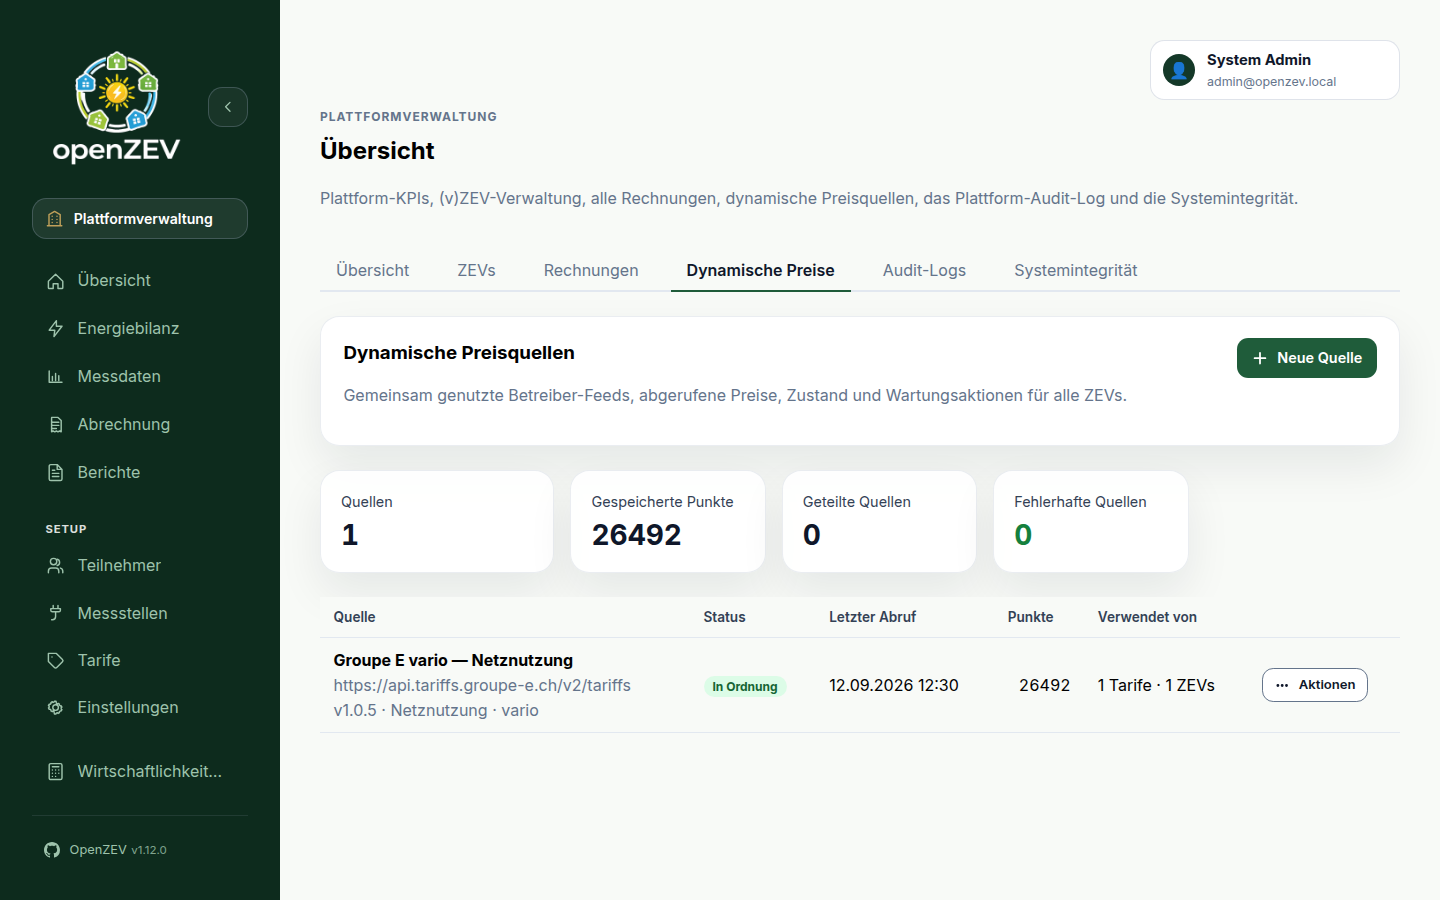
Platform → Overview → Dynamic prices (/admin/dynamic-sources) is the
operational console for dynamic tariff sources — the fetched, quarter-hourly
price series described in Tariff Configuration.
A source is global: it is not owned by any one ZEV, and any number of
communities on the same operator product share one fetch, so this console is
the only place to see and manage all of them at once.
KPIs at the top show how many sources are configured, how many price points are stored across all of them, how many sources are reused by more than one ZEV, and how many currently have a failed fetch. The table lists every source with its protocol version, billed component/product, current fetch status, last fetch time, stored point count, and how many tariffs/ZEVs reuse it.
Each row's menu offers:
- View prices — the fetched interval history: a date-range chart, interval table, min/max/average statistics, negative-price count, and any coverage gaps.
- View fetch log — audit events for this source only (fetch outcomes, edits, and destructive actions).
- Fetch now / Fetch available history — queue an immediate refresh, or a backfill of everything the endpoint still has. Backfill is disabled when the endpoint does not support ranged history requests.
- Re-check capabilities — re-probes the endpoint to correct how OpenZEV talks to it (in particular, whether it supports ranged/history requests) without changing the source's URL, protocol version, or billed component. Useful if backfill looked unsupported at creation but the endpoint was simply empty at that moment.
- Edit — change the source's display label. The endpoint, protocol version, and billed component/product cannot be changed in place; create a new source instead so two price series are never mixed under one label.
- Clear fetched prices — deletes the stored prices but keeps the source, which refills on the next scheduled fetch. Use this to recover from a wrong endpoint or product configuration.
- Delete source — removes the source entirely. Disabled, and labeled accordingly, while any tariff still uses it.
Both destructive actions ask you to type the source's own display label back before confirming — no separate reason field, since the label has to be read off the row you are about to affect, which is what actually prevents picking the wrong one. Both are refused while a fetch for that source is already running, and clearing is refused while a non-cancelled invoice was billed from a tariff linked to that source — the fetched prices are that invoice's supporting evidence and OpenZEV does not let you remove it out from under one.
System Settings
Regional display settings, feature flags, OAuth providers, and VAT rates are consolidated under Platform → System Settings.
Backups are configured in Platform → System Settings → Backup; see Backups.
Regional
Configure regional display settings in Platform → System Settings → Regional:
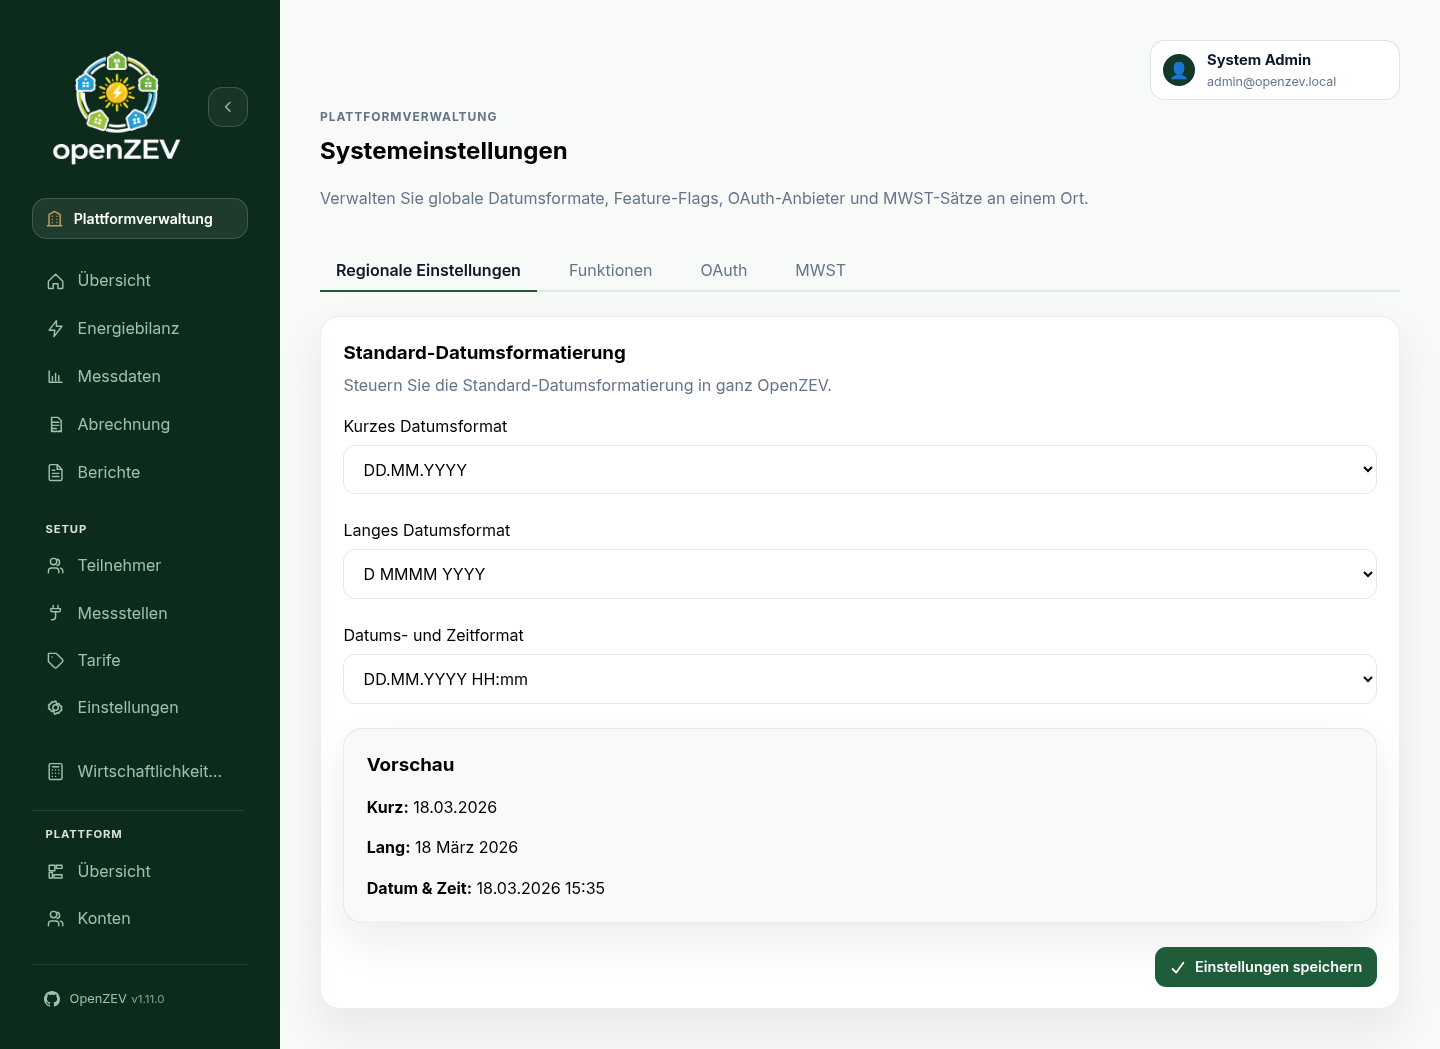
- Short Date Format — Compact date display (e.g.
DD.MM.YYYY) - Long Date Format — Expanded date display (e.g.
D MMMM YYYY) - Date/Time Format — Combined date and time display
Note: The legacy route
/admin/settings/regionalredirects here.
Functions
Feature flags are managed in Platform → System Settings → Functions. See Feature Flags below.
OAuth
Configure external OAuth login providers in Platform → System Settings → OAuth:
- Name — Provider identifier (e.g.
github) - Display Name — Human-readable label shown on the login page
- Client ID / Client Secret — Credentials obtained from the provider. The secret is never shown again after saving: enter it when creating the provider, and leave the field blank when editing to keep the existing secret.
- Authorization / Token / Userinfo URLs — Provider endpoint URLs
- Redirect URL — The callback URL registered with the provider (e.g.
https://app.example.com/api/v1/auth/oauth/callback/github/) - Scope — Space-separated OIDC scopes (default
openid email profile) - Enabled — Toggle to activate or deactivate the provider
Note: The legacy routes
/admin/features,/admin/oauth, and/admin/settings/vatredirect to the matching tab on the System Settings page.
Security
Choose which roles must use two-factor authentication, and the grace period they get, in Platform → System Settings → Security. See Roles and Permissions → Requiring it for a role.
VAT
Configure VAT rates in Platform → System Settings → VAT. See VAT Settings for validity-window behavior and the workflow.
Audit Logs
The audit log is the cross-cutting, append-only event stream of privileged, billing-relevant, and destructive actions.
- Platform → Overview → Audit log (
/admin/audit) — admins can view all events across the platform. - Setup → Settings → Audit log (
/zev-settings/audit) — admins and ZEV owners see the events of the currently selected community. Owners only see events for ZEVs they manage; they cannot see global or other-ZEV events. There is no community selector here (it follows the sidebar switcher) and no text search; the filters are date range, actor, category, action type, and status. (The legacy route/audit-logsredirects here.)
Platform → Overview → Audit log supports the full filter set: date range, community (ZEV) selector, actor, category, action type, status, and text search. Text search is available only to admin users. Events are read-only — there is no public write endpoint.
The quickest way in is from the account itself: View activity on a row under Platform → Accounts → Users opens the audit log already filtered to what that account has done.
The API is GET /api/v1/audit/events/ (list) and
GET /api/v1/audit/events/{id}/ (detail). See the access spec
2026-05-audit-log-and-operational-traceability.md
for the data model and redaction rules.
System Health
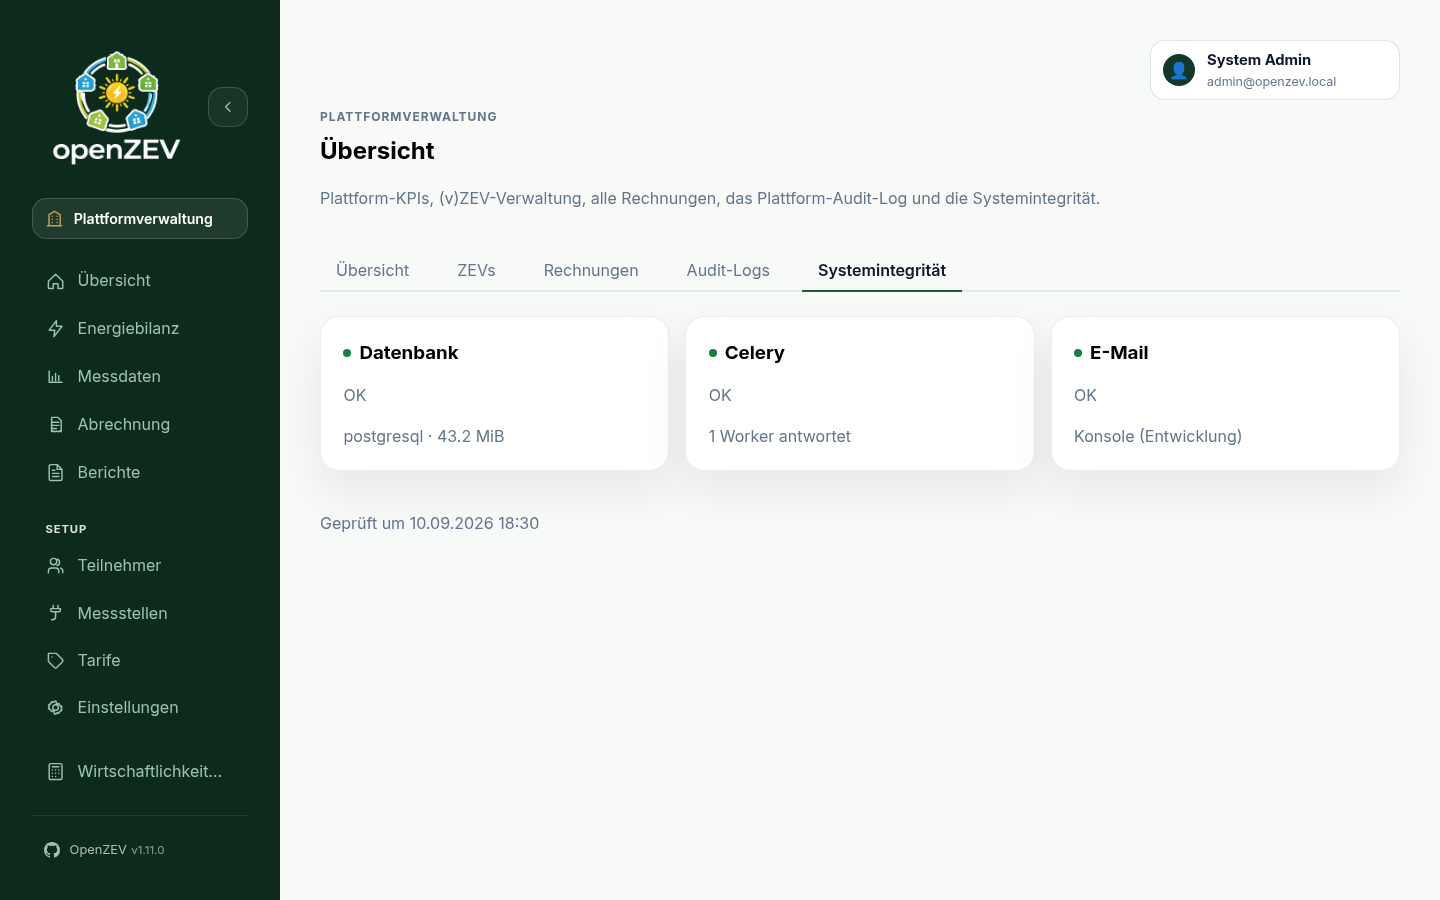
Platform → Overview → System health (/admin/health) shows a read-only
snapshot of platform infrastructure:
- Database — engine (PostgreSQL/SQLite) and size;
degradedif the probe fails - Celery — number of workers responding to a ping and the Redis queue
depth;
unknownmeans no broker is reachable (local development without Redis reports unknown, which is a valid state, not an outage) - Email — the configured backend mode (SMTP, console, in-memory, custom)
The snapshot is taken when the tab is opened (no auto-refresh). Probes are best-effort — a failing probe never breaks the page.
API Keys
Automated integrations (imports, monitoring scripts) authenticate with per-user API keys.
- Account Profile → API Keys — a user manages their own keys (create with a name and expiry, and revoke). See API Keys.
- Platform → Accounts → API keys (
/admin/accounts/api-keys) — admins can view all keys across users and revoke any of them. This view is revoke-only; keys are created by their owner. (The legacy route/admin/api-keysredirects here.)
Security: API keys grant the same access as the owning account. Treat them like passwords, and revoke unused or exposed keys promptly.
VAT Settings
Admins configure VAT rates in Platform → System Settings → VAT.
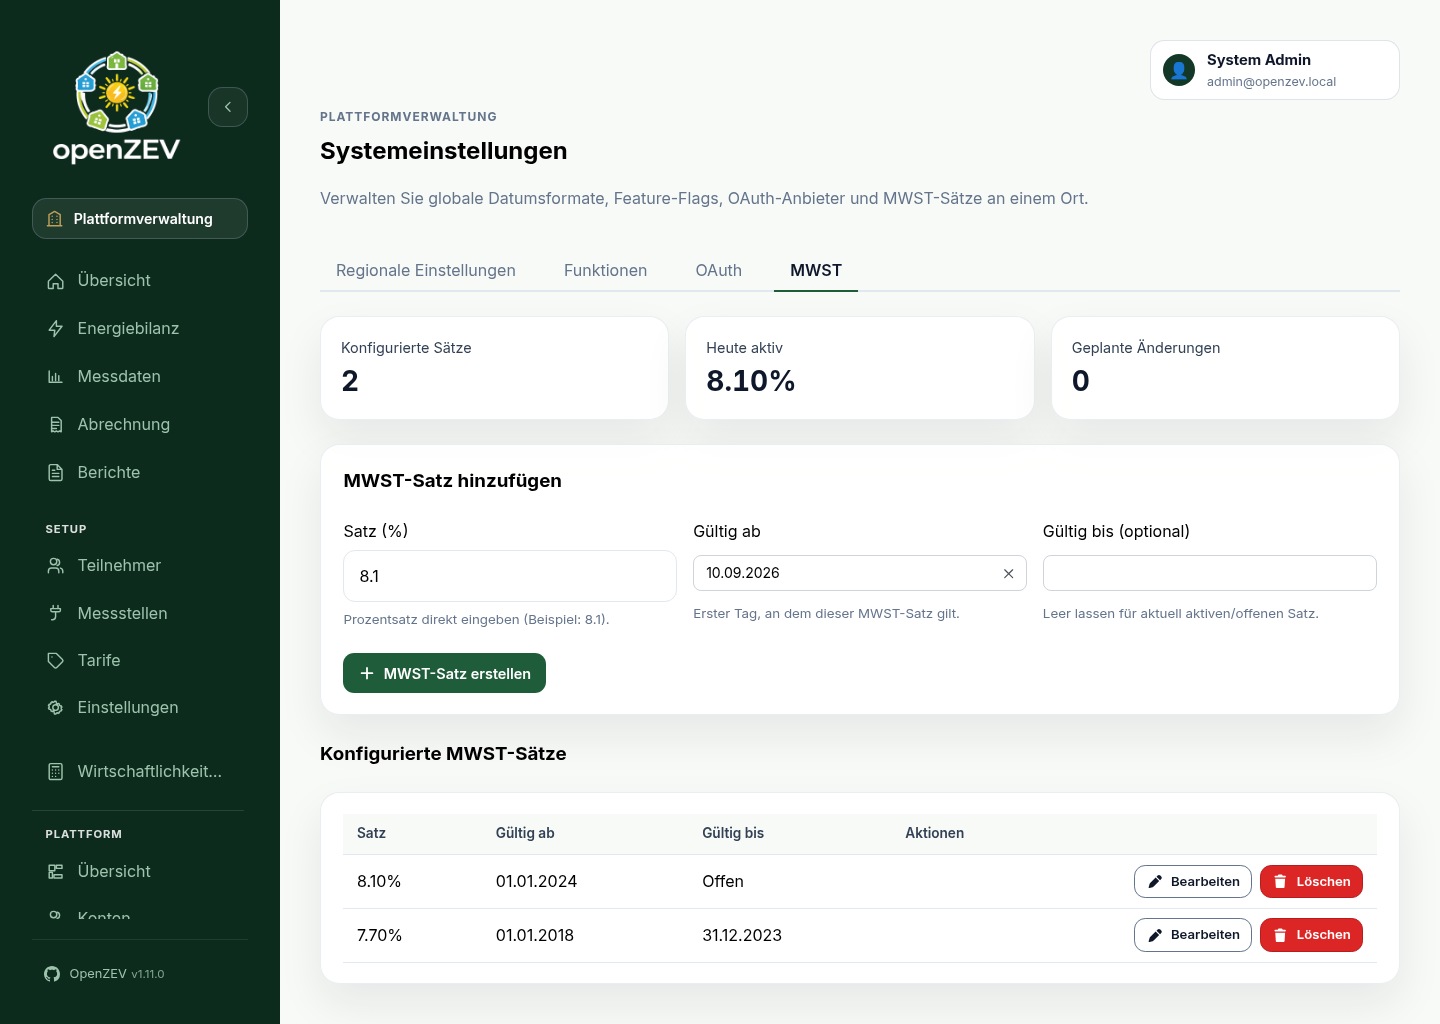
The rate, Valid from, and optional Valid to fields appear together with guidance beneath each field. Select either date field to open its calendar; leave Valid to empty for an open-ended rate. On narrow screens the form wraps the fields onto separate rows.
VAT rates are validity-window based — you can set rates for specific time periods. The system automatically applies the correct rate based on the invoice period end date.
How VAT Works
- A ZEV owner chooses the ZEV's VAT treatment in ZEV Settings (VAT-registered also needs the VAT Number)
- An admin configures the applicable VAT rate(s) in Platform → System Settings → VAT
- When invoices are generated, the system looks up the rate active on the invoice period's end date
A ZEV that is Not VAT-registered is billed without VAT. If no VAT rate is active for an invoice period, VAT defaults to 0% in every mode.
Invoice PDF Templates
Admins can manage the HTML/CSS template used for invoice PDF generation in Platform → Templates → PDF templates (/admin/templates/pdf).
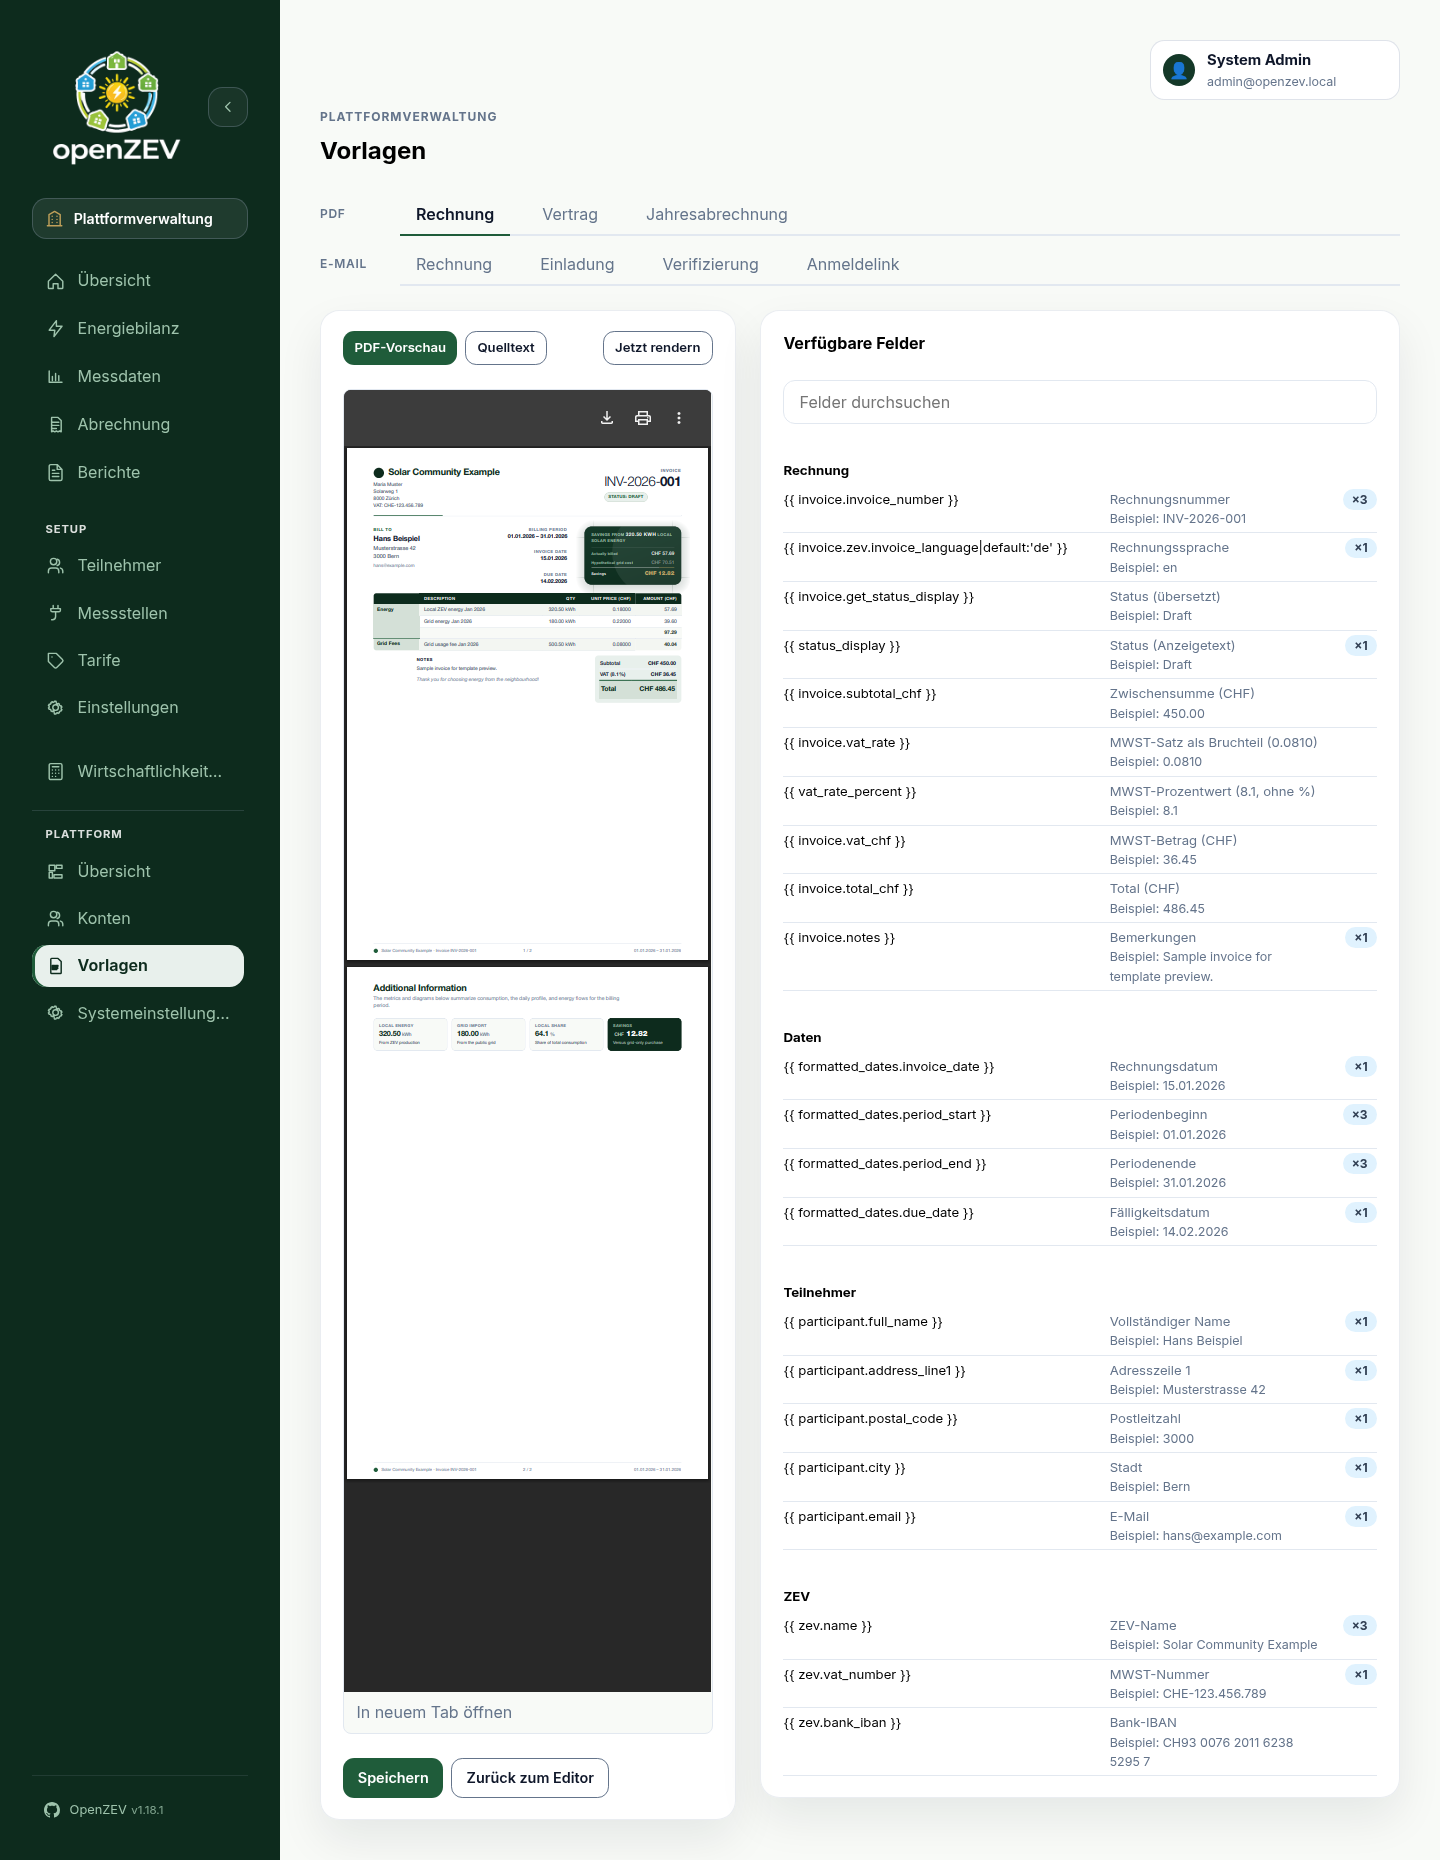
- Edit the template used for invoice PDF rendering (tabs for the invoice, participant contract, and annual statement templates)
- The Available Fields panel lists supported fields with preview examples. In source view, search by token or description and click a token to insert it at the caret. Shift-click keeps the caret in its original position. Loop tags insert a ready-to-fill block.
- Preview shows a real, sample-data PDF rendered through the same pipeline as issued documents; a source toggle reveals the raw template markup
- Template changes affect future PDF renders. Existing stored PDFs remain unchanged until regenerated — individual invoices can be regenerated, and administrators can regenerate PDFs for an entire billing period.
Email Templates
Admins manage system-wide default email templates in Platform → Templates → Email templates (/admin/templates/email).
Note: ZEV owners can also customize email templates for their own ZEV in ZEV Settings → Documents & emails. See ZEV Setup for per-ZEV customization, and Email Configuration for SMTP setup and delivery tracking.
Overview
OpenZEV uses four email templates:
| Template | Purpose |
|---|---|
| Invoice Email | Sent to participants when invoices are delivered |
| Onboarding Email | Sent when an owner chooses Send onboarding link on a participant, with a reusable onboarding link |
| Verification Email | Sent for email address verification |
| Sign-in Link Email | Sent when a participant asks for a sign-in link from the QR code on their invoice (see Participant Access from the Invoice) |
The Sign-in Link Email is the one template whose recipient never sees a copy
of anything else you send — it exists only to carry {link_url}. If your edit
uses a placeholder that does not exist, OpenZEV sends the shipped default
instead, so the link always works even when the wording is not yours.
Administrators can edit the default subject and body for each template. These defaults are used unless a ZEV owner has set a custom template for their ZEV.
Accessing Email Templates
- Navigate to Platform → Templates → Email templates
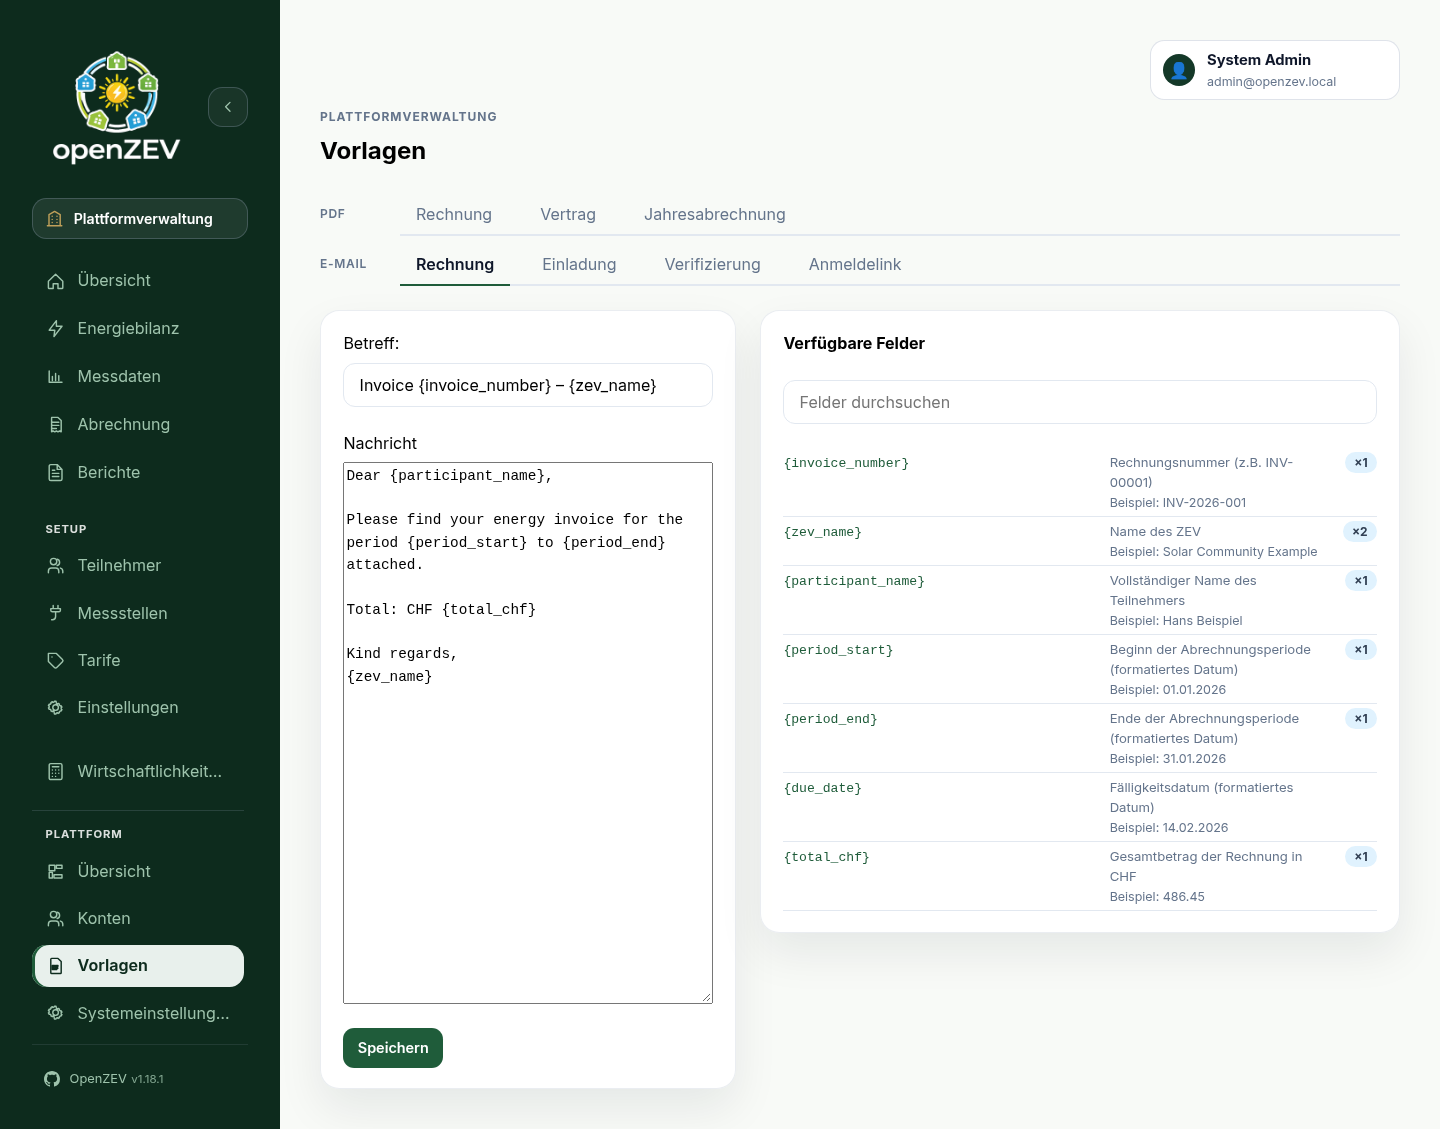
- The page displays four tabs — one per template type
Editing a Template
- Select the tab for the template you want to edit (e.g. Invoice Email)
- Edit the Subject and Body fields
- Click Save
The body editor uses a monospace font to make placeholder variables easier to read and edit.
Template Variables
Each template supports placeholder variables. Use {variable_name} syntax in the subject or body — they are replaced with actual values when the email is sent.
The Available Fields panel lists the supported variables for the selected template, with translated descriptions, sample values, and a usage count. The panel is keyboard-focusable and scrollable. Use the search box to filter by token or description. Click a token to insert it at the editor caret; Shift-click keeps the caret in its original position.
Invoice Email Variables
See Email Configuration → Email Templates for the invoice email placeholders.
Onboarding Email Variables
| Variable | Description |
|---|---|
{participant_name} |
Full name of the participant |
{inviter_name} |
Name of the person who added the participant |
{zev_name} |
Name of the ZEV |
{link_url} |
Reusable onboarding link |
{expiry_date} |
Formatted onboarding-link expiry date |
Verification Email Variables
| Variable | Description |
|---|---|
{verify_url} |
Email verification link URL |
Sign-in Link Email Variables
| Variable | Description |
|---|---|
{participant_name} |
Full name of the participant |
{zev_name} |
Name of the ZEV |
{link_url} |
One-time sign-in link |
{valid_minutes} |
Sign-in-link lifetime in minutes |
Customization Indicator
When a template has been edited, a Customized badge appears next to the template title. This helps you see at a glance which templates have been changed from the built-in defaults.
Resetting to Default
If a template has been customized, a Reset to Default button appears alongside the Save button. Clicking it restores the original built-in template for that email type.
Templates that have not been customized do not show the reset button.
Invoice Management
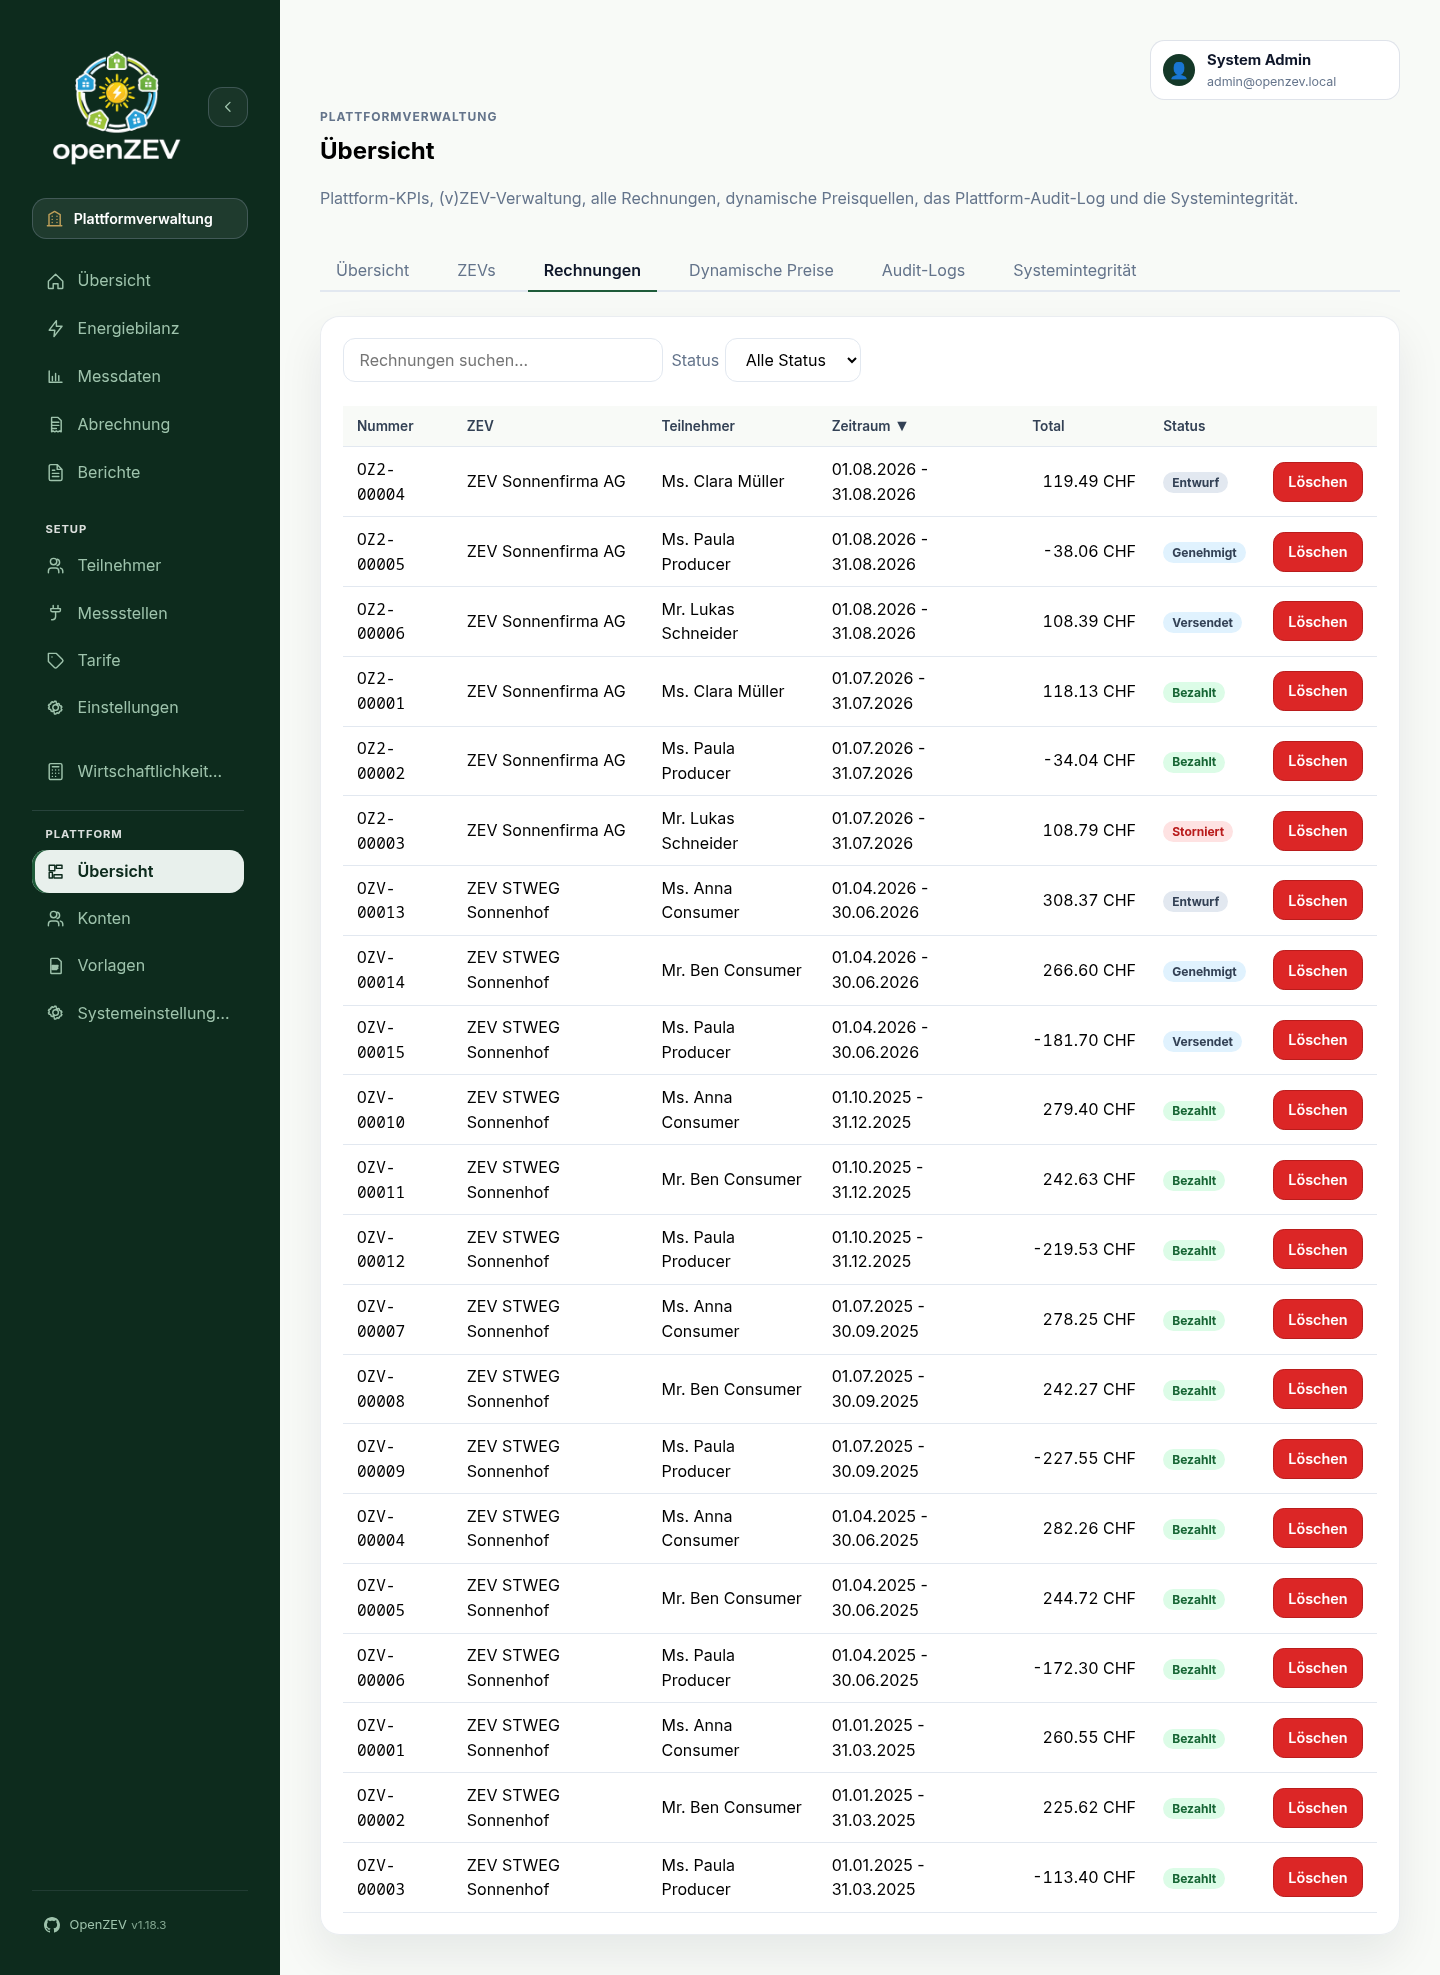
Admins can view and manage all invoices across all ZEVs in Platform → Overview → Invoices (/admin/invoices).
Overview
The admin invoice page provides a searchable, sortable table of every invoice in the system, regardless of which ZEV it belongs to.
| Column | Description |
|---|---|
| Number | Invoice number (e.g. INV-00001) |
| ZEV | The ZEV the invoice belongs to |
| Participant | Participant name |
| Period | Billing period date range |
| Total | Invoice total in CHF |
| Status | Badge showing Draft, Approved, Sent, Paid, or Cancelled |
| Actions | Delete button |
Searching and Filtering
- Use the quick filter search bar in the toolbar to search across all columns.
- Click on a column header to sort by that column.
- Use column-level filters for more targeted searching (e.g., filter by status using the dropdown).
Deleting Invoices
Admins can delete any invoice directly from this page:
- Click the Delete button in the Actions column.
- Confirm the deletion in the confirmation dialog.
Warning: Deleting an invoice is permanent and cannot be undone. The invoice and its associated PDF are removed.
Feature Flags
Feature flags are runtime switches that allow you to enable or disable specific functionality without changing code.
Feature flags can be controlled by:
- Code defaults (defined in backend code)
- Environment variable overrides
- Platform toggles (System Settings → Functions)
The backend and frontend both read the same feature flag state.
Current Feature Flags
| Flag name | Default | Purpose |
|---|---|---|
zev_self_registration_enabled |
true |
Allows ZEV owner self-registration from the login page |
feasibility_calculator_enabled |
false |
Shows the feasibility calculator to admins and ZEV owners |
participant_geocoding_enabled |
false |
Looks up participant buildings on OpenStreetMap for the participant map; sends addresses to the public Nominatim service |
How State Is Resolved
For each flag, OpenZEV resolves the final state in this order:
- Environment variable
FEATURE_<FLAG_NAME_IN_UPPERCASE> - Value stored in database (set via Platform → System Settings → Functions)
- Code default
falsefallback
For zev_self_registration_enabled, the environment variable key is:
FEATURE_ZEV_SELF_REGISTRATION_ENABLED=true
Managing flags via the UI
Manage flags in Platform → System Settings → Functions.
Each flag has:
- Name
- Description
- Toggle switch (On/Off)
When you toggle a flag, OpenZEV applies the new value immediately.
Environment Variable Override
Use environment variables when you want an ops-level override that should win over UI settings.
Example:
FEATURE_ZEV_SELF_REGISTRATION_ENABLED=false
After changing environment variables, restart the backend service (and frontend if needed):
docker compose restart backend frontend
Example: Disable ZEV Self Registration
If zev_self_registration_enabled is disabled:
- The login page hides the "New to OpenZEV" panel
- The registration button/modal is not shown
POST /api/v1/auth/register/is blocked by the backend (HTTP 403)
This ensures the feature is disabled in both UI and API layers.
API Access
Read feature flags
GET /api/v1/auth/feature-flags/- Admin only (returns the full flag list; used by the Platform system settings)
Read self-registration status (public)
GET /api/v1/auth/registration-enabled/- Public, returns only
{"enabled": bool}(used by the login page; does not enumerate the flag table)
Update a feature flag
PATCH /api/v1/auth/feature-flags/<id>/- Admin only
Payload example:
{
  "enabled": false
}
Developer Usage
Feature flags are registered in backend code and synchronized to the database.
Add a new flag in backend/accounts/models.py:
FeatureFlag.register(
    "my_new_feature",
    default=False,
    description="Explain what this feature controls.",
)
Check a flag in backend code:
if FeatureFlag.is_enabled("my_new_feature"):
    # feature-on path
    ...
Frontend admin pages read the full list via GET /api/v1/auth/feature-flags/
(admin only). Public, unauthenticated code (e.g. the login page) must use the
minimal GET /api/v1/auth/registration-enabled/ endpoint instead.