ZEV Setup and Configuration
This guide covers creating and configuring a ZEV energy community in OpenZEV.
What is a ZEV?
A ZEV or vZEV is a self-consumption community under Swiss energy law:
- Members (participants) share locally produced solar energy
- Energy is allocated fairly using a timestamp-level allocation model
- Billing is transparent and community-auditable
OpenZEV supports operating one or many ZEVs, each with independent:
- Participants
- Metering points
- Tariffs
- Invoicing schedules
There are two types:
- ZEV — Zusammenschluss zum Eigenverbrauch: the members sit behind one shared grid connection
- vZEV — virtueller Zusammenschluss zum Eigenverbrauch: the members keep their own grid connections and are combined through the grid operator's meters
Creating a ZEV
There are two ways to create a ZEV:
Option A: Self-Registration (ZEV Owner)
New ZEV owners can register themselves and create their ZEV without admin involvement.
Step 1: Register on the login page
- Go to the login page
- In the New to OpenZEV? panel on the right, click Create account
- In the modal, enter your Email address — it is your sign-in name
- Click Send verification email
The panel is shown only while self-registration is enabled (an admin can turn it off under Platform → System Settings → Functions).
Step 2: Verify your email
- Open the verification email ("Verify your OpenZEV account")
- Click the verification link (valid for 24 hours)
- You are redirected to the setup wizard
Step 3: Set your password (Step 1 of 2)
- Enter a new password (minimum 8 characters)
- Confirm the password
- Click Set password & continue
Step 4: Create your ZEV (Step 2 of 2)
- Fill in the ZEV details:
- ZEV Name — Community identifier (required)
- Start Date — When the ZEV begins operation (defaults to today)
- ZEV Type —
ZEVorvZEV - Billing Interval — Monthly, quarterly, semi-annual, or annual
- Postal Code — Postal code of the grid connection (optional); suggests the grid operator below from ElCom's official register
- Grid Operator — Your VNB name (optional)
- Payment recipient address — your address, printed as the QR-Rechnung creditor
- Bank Name — Bank holding the payment account (optional)
- Bank IBAN — Account receiving participant payments (optional; required for QR payment details)
- Click Create ZEV & finish
- You are redirected to the dashboard as the owner of your new ZEV
Note: Self-registration creates the account with the
zev_ownerrole. Each self-registered owner can create exactly one ZEV via this flow.The IBAN belongs to the account that receives participant payments. If you enter one, provide the payment recipient's address as well so QR-Rechnungen can be generated. Skipping it leaves invoices without payment details until you add it under Billing & payment in ZEV Settings.
Option B: Admin-Created ZEV (with Responsible Person Wizard)
Admins can create a ZEV together with a new responsible-person account in a single wizard. See Platform → Overview → ZEVs for details.
ZEV Settings
ZEV Owners configure their community in ZEV Settings (sidebar entry
Setup → Settings, /zev-settings). The settings are organized into tabs:
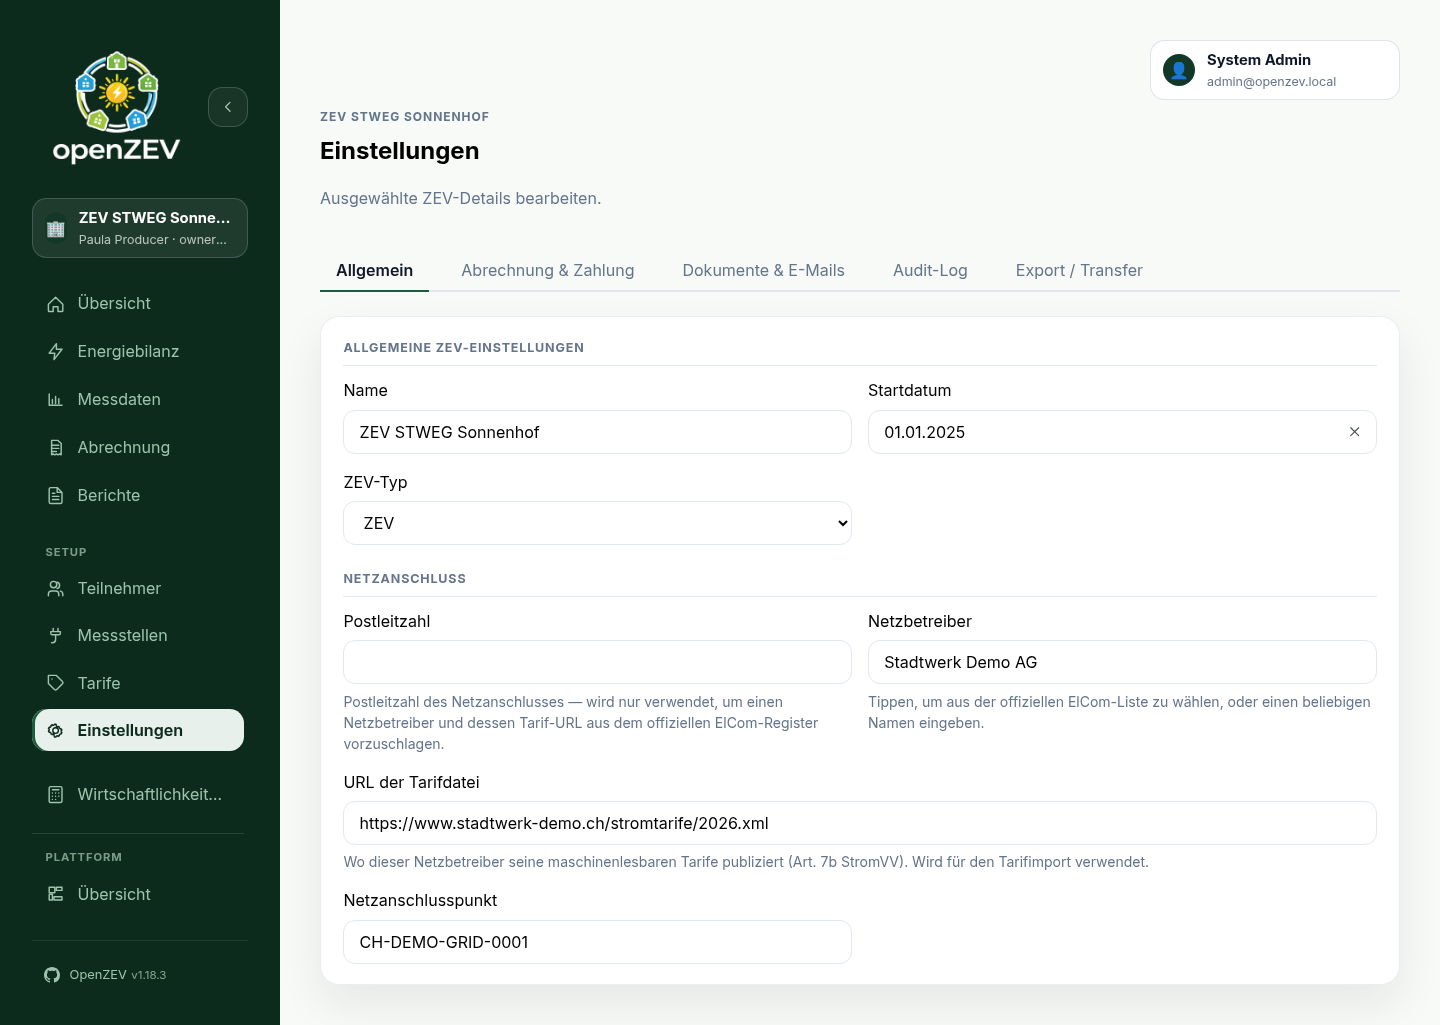
- General — name, start date, ZEV type, grid connection
- Billing & payment — billing interval, invoice language, payment term, invoice presentation, participant QR code, invoice prefix, bank details, VAT
- Documents & emails — invoice email template, notes, contract notes
- Audit log — this ZEV's audit events (see Audit Logs)
- Export / transfer — whole-ZEV export archive (see ZEV Export and Import)
One save bar serves every tab: Unsaved changes with Save changes / Discard changes. Switching tabs keeps your edits. Saving checks all settings; if another tab has an invalid field, the page opens it and focuses the field. If the server rejects a field, its error appears beside the control and focus returns to that control once saving finishes. Your edits remain available to correct and retry. Switching communities asks for confirmation while edits are unsaved. Save or discard before navigating to another page.
General tab
General ZEV Settings
| Setting | Purpose | Required |
|---|---|---|
| Name | Community identifier | Yes |
| Start date | When the ZEV begins operation | Yes |
| ZEV type | ZEV or vZEV |
Yes |
Grid Connection
In Grid Connection, each field's guidance appears directly beneath it.
| Setting | Purpose | Required |
|---|---|---|
| Postal Code | Postal code of the grid connection. Used only to suggest a grid operator and its tariff document URL from the official ElCom register — see below | No |
| Grid Operator | VNB name (Verteilnetzbetreiber) | No |
| Tariff document URL | Where this operator publishes its machine-readable tariffs (Art. 7b StromVV). Used by the tariff import | No |
| Grid Connection Point | Verknüpfungspunkt / EAN identifier | No |
Tip: Enter a Postal Code and OpenZEV suggests the grid operator that serves it, sourced from ElCom's official register. Click the suggestion to fill in Grid Operator. If that operator has a registered tariff document URL, a second suggestion offers to fill in Tariff document URL too — but only after Test this URL confirms the address actually serves a tariff document. Operators sometimes move the file without ElCom's copy being updated, so an untested suggestion is never saved automatically, and an address you already entered is never overwritten.
Billing & payment tab
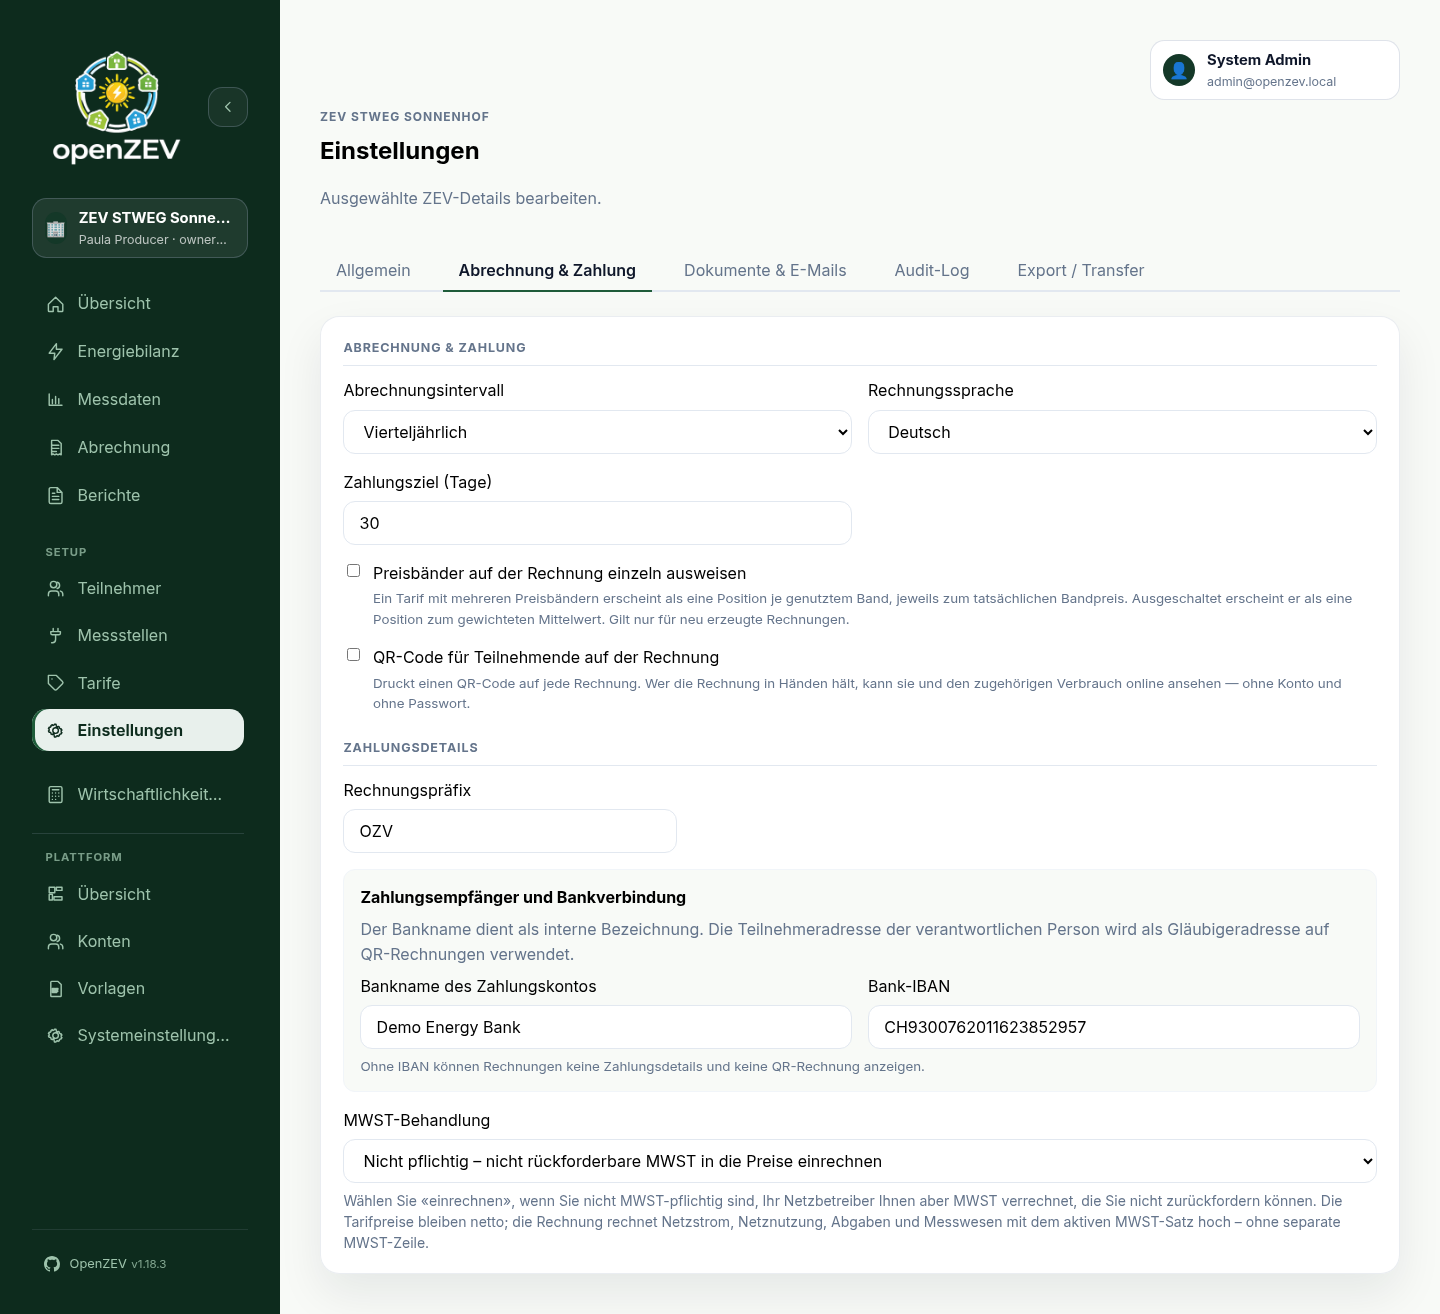
Billing & Payment
| Setting | Purpose | Required |
|---|---|---|
| Billing interval | Invoice frequency (see below) | Yes |
| Invoice language | Language for generated PDFs (de/fr/it/en) | Yes |
| Payment term (days) | Days from the issue date until payment is due (default 30, 1–365) | Yes |
| Itemise price bands on the invoice | Show each price band of a multi-band tariff as its own line (see below) | No |
| Participant QR code on the invoice | Print a QR code that opens the invoice online (see below) | No |
Payment Details
| Setting | Purpose | Required |
|---|---|---|
| Invoice prefix | Prefix for invoice numbers (default: INV) |
No |
| Bank name | Internal reference for the payment account | No |
| Bank IBAN | Account participants pay into; without it invoices carry no payment details or QR payment slip | No |
| VAT treatment | How VAT is applied when billing participants (see below) | No |
| VAT number | Swiss UID — shown only when VAT treatment is VAT-registered | If registered |
The QR-Rechnung creditor address is the address of the ZEV's responsible person, taken from their participant record.
Documents & emails tab
The invoice email template (see Email Templates below) and these free-text fields:
| Setting | Purpose |
|---|---|
| Notes | General notes about the ZEV |
| Local Tariff Notes | Free-text conditions for local tariff (appears on contract PDF) |
| Additional Contract Notes | Extra text for participation contract PDF |
Billing Interval
Choose how often invoices are generated:
- Monthly — One invoice per month
- Quarterly — One invoice per 3 months
- Semi-Annual — One invoice every 6 months
- Annual — One invoice per year
Tip: Monthly is most common for community billing; annual works for smaller communities or cooperatives with annual settlements.
VAT Configuration
VAT treatment has three options:
- Not VAT-registered (default) — tariff prices are billed exactly as you entered them. No VAT line appears. Use this when the prices you entered are already the final amounts your participants should pay.
- VAT-registered — enter your VAT Number (UID format), and ask an admin to configure VAT rates (Platform → VAT Settings). Tariff prices are treated as net; the invoice adds the active rate on top and shows a VAT line. You reclaim the VAT you pay upstream in your own VAT return.
-
Not registered — fold VAT into prices — for the common case of a small ZEV that is not registered but whose grid operator invoices it with VAT it cannot reclaim. Enter tariff prices net, exactly as the operator publishes them (this is also what the tariff import writes). At invoice time OpenZEV grosses up grid energy, grid fees, levies and metering by the active VAT rate. Your own local (solar) energy and the feed-in credit are left untouched. No VAT line appears — a non-registered issuer must not show one — but the amounts billed are gross, so you recover what the operator charged you. The folded-in VAT is recorded per invoice for your bookkeeping.
An admin still has to configure the VAT rate for this to take effect; with no active rate, prices are billed unchanged.
If no VAT rate is active for an invoice period, VAT defaults to 0% in every mode.
Price bands on the invoice
A tariff can carry several price bands — peak and off-peak, a weekend rate, a different winter price. By default such a tariff appears on the invoice as one line, priced at the average of the bands your participant actually used, weighted by how much they used in each.
That average is nobody's published rate. It also differs from participant to participant: someone who runs their washing machine at night gets a lower figure than their neighbour, from the same tariff. Neither can check the invoice against the tariff sheet they were given.
Tick Itemise price bands on the invoice and each band that was used gets its own line at its own rate:
Netznutzung – HT (Hochtarif)    412.0000 kWh × 0.28400   117.01
Netznutzung – NT (Niedertarif)  638.0000 kWh × 0.19100   121.86
The bands are named the way your participation contracts name them, so the two documents agree.
The invoice costs exactly the same either way — a tariff's total is worked out first and then divided across its band lines, never the other way round. A tariff with only one band is never split.
Fixed monthly and yearly fees are not affected: they have no bands. Neither are percentage-of-energy tariffs, whose price comes from the grid rate rather than from a band of their own.
This changes invoices generated from now on. Invoices you have already generated are left exactly as they are; regenerate one (only possible while it is still a draft) if you want it in the new shape.
Participant Access from the Invoice
Off by default, and no upgrade turns it on for you.
Tick Participant QR code on the invoice under Settings → Billing & payment and every invoice you generate from then on carries a second QR code on its insights page. Scanning it opens that one invoice — the total, whether it is paid, the line items, the consumption figures and the same three charts the insights page prints — with no account and no password.
The setting changes invoices generated from now on. Invoices already generated keep whatever they were printed with.
What the QR deliberately cannot do: reach any other invoice, name any other participant beyond what the energy-flow diagram already prints on the same sheet, or change anything.
Two things to know before turning it on:
- The link never expires. It is printed on a document that sits in a folder for years, and a link that dies underneath it is a support ticket rather than a security control. Revoking is the control — see Invoice Management → Participant access links.
- Anyone holding the invoice can open it. That is the design: the page shows nothing the printed page does not already show. But it does mean a photographed or mis-delivered invoice is readable by whoever has it, until you revoke the link.
The QR sits on the insights page and never on a sheet carrying the QR-Rechnung, so the two codes cannot be confused; it is smaller and captioned "this is not a payment code" in all four languages. An invoice with no consumption gets no QR, because there would be nothing to show.
From the page, Send me a sign-in link emails a one-time link to the address you have on file for that participant, which opens the ordinary participant portal. The requester never gets to say where it goes — the invoice identifies them — and nobody sets a password at any point.
Email Templates
ZEV Owners can customize invoice email templates in ZEV Settings → Documents & emails:
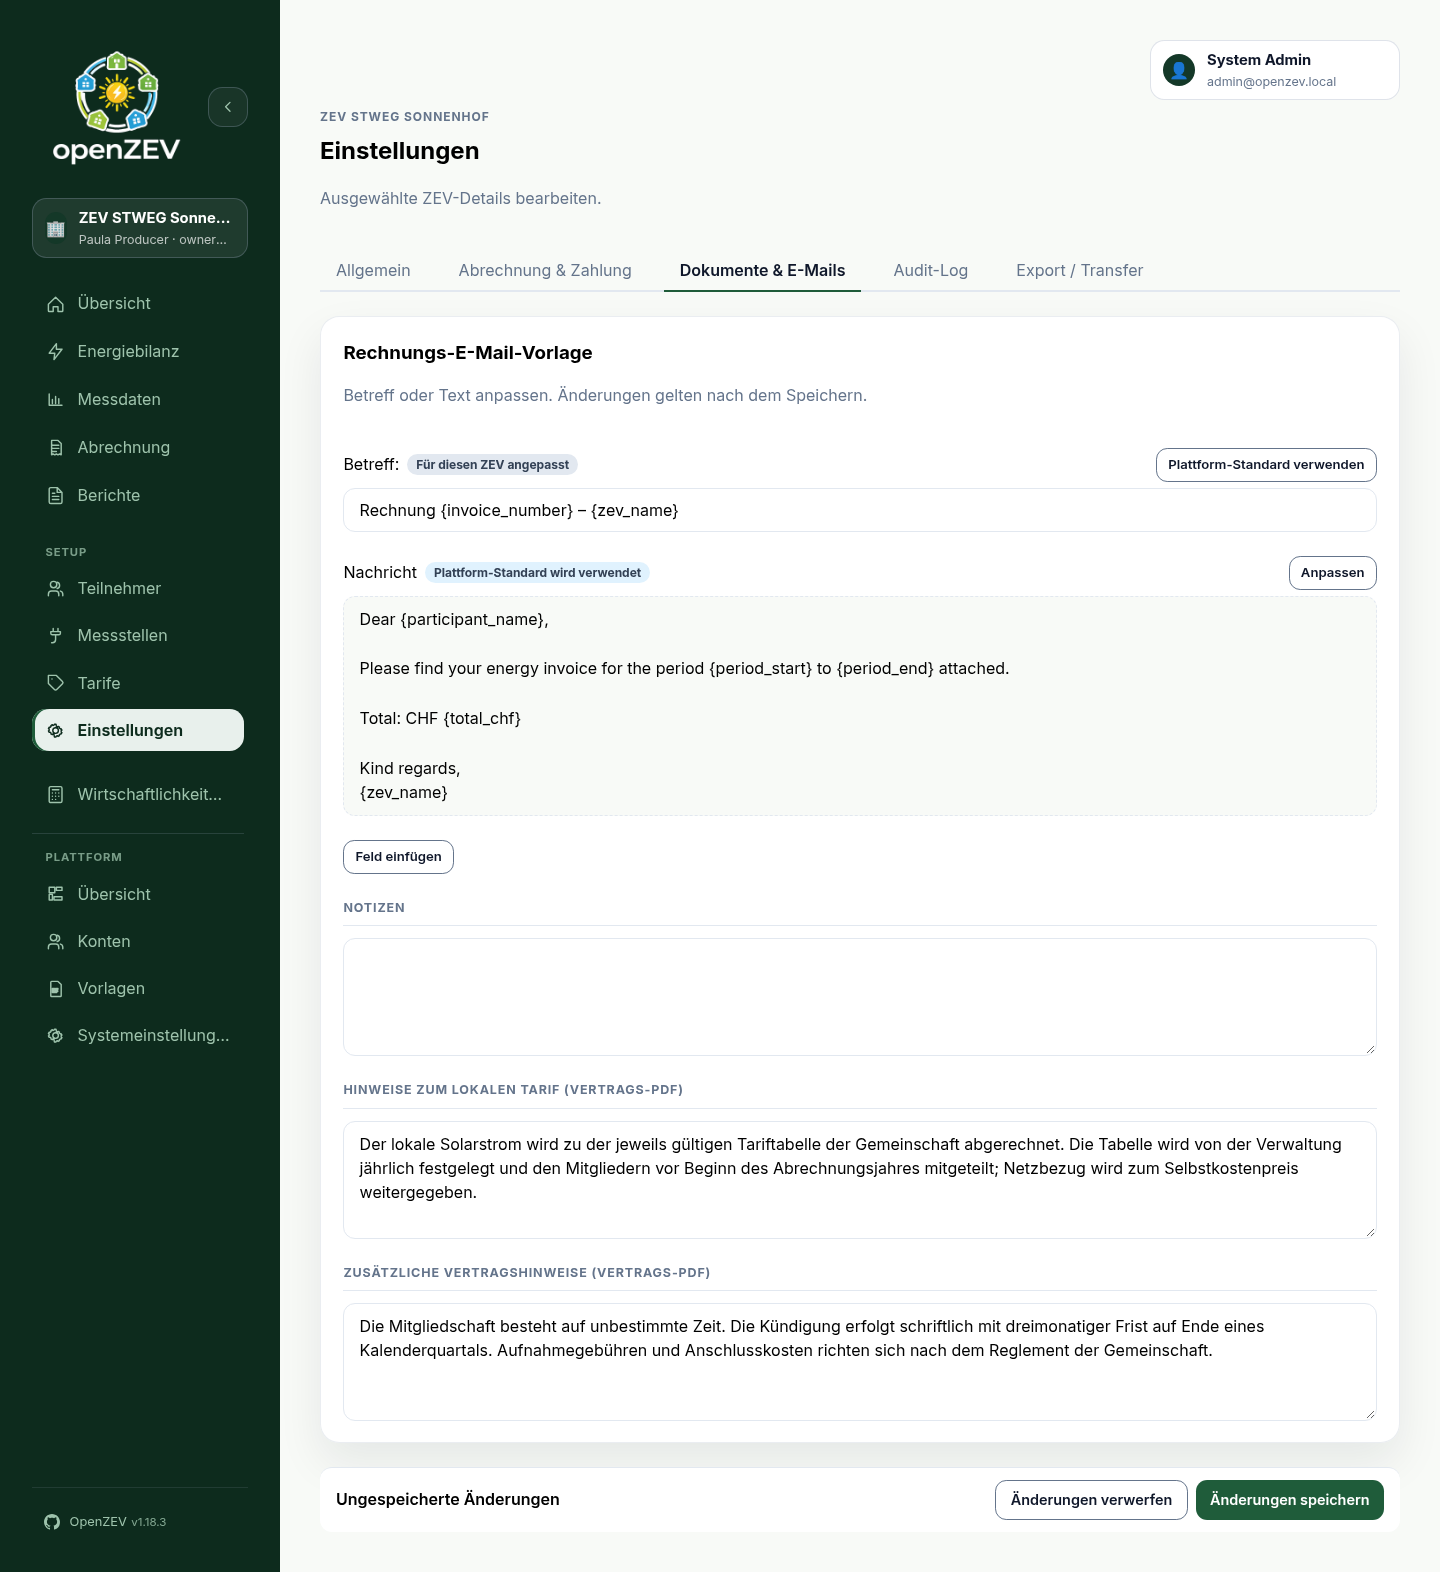
- Subject line — Email subject sent with invoices
- Email body — Message body sent with invoice PDF attachment
Both fields support variable placeholders such as {invoice_number}, {zev_name}, {participant_name}, {period_start}, {period_end}, and {total_chf}. See Email Configuration → Email Templates for the full variable reference.
Subject and body are independent: each shows the platform text with Using platform default, or your own text with Customized for this ZEV. Customize starts the editor from the platform text (or blank if it cannot be loaded); Use platform default clears one field. Like any edit, both take effect on Save changes only. Text matching today's platform default still counts as a customization once saved.
If a template contains an invalid placeholder, the system falls back to defaults automatically.
For more details on email delivery, see Email Configuration. For system-wide default email templates managed by admins, see Platform → Templates → Email templates.
Access Control
ZEV access is controlled via role assignments:
| Role | Access |
|---|---|
| Admin | Global access to all ZEVs, users, and settings |
| ZEV Owner | Full operational management of owned ZEV(s) |
| Participant | Read-only access to own metering data and invoices |
Admins manage user accounts in Platform → Accounts.
Participants automatically see only their own metering data and invoices (ZEV-scoped access).
Data Ownership and Privacy
- All metering data is scoped to the ZEV — participants cannot see other participants' readings
- Invoices are private to their recipient and ZEV owners
- Admins have global read access for monitoring and compliance
Multi-ZEV Operations
If running multiple ZEVs:
- ZEV switcher: Use the ZEV switcher at the top of the sidebar (top-left); the selected community is also shown above the page title on every page. Under Platform pages (
/admin/*) the switcher is replaced by the Platform administration indicator — enter a ZEV via Platform → Overview → ZEVs → Manage instead - Each ZEV is independent: Tariffs, participants, and invoices are isolated
- Owners can manage one or more ZEVs: Admin can assign ownership of additional ZEVs
Next Steps
- Add participants: Managing Participants
- Configure metering points: Metering Points
- Import readings: Metering Imports
- Set up tariffs: Tariff Configuration
- Email setup: Email Configuration